
Imagine a world where you can host an API that is allowed 1 million free API calls per month, automatic scaling and zero maintenance. It is all possible with Amazon Web Services' (AWS) Lambda functions. However getting started can be a bit confusing.
There are many steps you need to follow and understand before deploying and executing your first lambda function. But it's not as hard as you think. This blog post will show you how you can easily get started with AWS' "functions as a service" platform.
To do this part of the tutorial you will need to...
- Have knowledge of how to read JavaScript and JSON
- Have an AWS account
Getting Started
First, you need to sign into the AWS console. Then type "Lambda" in the search field under where it says AWS services, and hit enter.
Then press "Create a Lambda Function".
After that, you will be presented with the blueprints page. Here there are several pre-made functions that you could use as examples or starter templates. As of June 2017 there is only Python and Node.js runtimes on the blueprint page, but you are able to also use Java (this includes all JVM languages such as Clojure and Scala) and .NET (C#) if you deploy from the command line. Since I'm a Node guy, I use Node.
Now go to where it says "select runtime", and select Node.js 6.10. Then select the "hello-world" blueprint. You might need to type "hello-world" into the filter field, adjacent of the runtime field, for the "hello-world" blueprint to appear on the screen.
The next page is where you configure triggers for the function. There are many choices. For example you can cause the function to be triggered through an HTTP request, when a file gets uploaded to S3 (Amazon's cloud storage service) or if something gets pushed to CodeCommit (Amazon's version control repository service). Ideally these are better added with automation through Serverless or CloudFormation (Amazon's infrastructure automated deployment service). Now, press next.
Now type "hello-lambda" for the function name, and leave the description as is.
Replace the code with the following:
'use strict';

console.log('Loading function');

exports.handler = (event, context, callback) => {
    //console.log('Received event:', JSON.stringify(event, null, 2));
    console.log('Hello lambda!')
    callback(null, event.key1);  // Echo back the first key value
    //callback('Something went wrong');
};
Roles
Scroll down to where it says "Role". A role is where you give your function rights to access other AWS resources such as: giving permission to make logs with CloudWatch or to interact with an S3 bucket. A common practice for naming roles, is to name a role based on what the function with this role is doing. If a function is a contact form response then you could call it "contact-form-responder". A role can have several "Identity Access Management (IAM) policies" Which are the statements that allow the function to use AWS resources. These are written in JSON.
{
    "Effect": "Allow",
    "Action": "logs:CreateLogGroup",
    "Resource": "arn:aws:logs:us-east-1:123456789012:log-group:my-log-group"
}
Each policy statement has the following
-
Effect: either "Allow" or "Deny" the resource specified in the policy. Effect is "Deny" by default so you would normally only write "Allow".
-
Action: is what actions the policy allows. In the above example you are giving the ability to create a new log group. This can then be used to view logs from the AWS resource using this policy.
-
Resources: This is which resources you have given the policy access to. In the example above we have given access to the CloudWatch logs. The syntax means:
arn:partition:service:region:account-id:log-group-name.
Here are some great resources for creating roles...
- AWS docs for IAM Policies
- AWS docs for Amazon Resource Names
- Cloudonaut - a great reference for finding the right policy for your use case
Now time to add a role to our function. Name the role, "lambda-demo". Don't select any policy templates. We will need logs but, by default logs will already be enabled when you create a role.
Now scroll down to where it says "Advanced settings" and press on it. Here you define the configuration for your function. Most importantly "memory" and "timeout". The main thing to consider here is that, beyond your free 1 million API calls per month and 400,000 GB-seconds of compute time per month, how much you are billed depends on how much memory you add to your function and how long it runs. This can be a tricky balance though since sometimes when you increase memory you can decrease the time functions run. Check out the AWS Lambda pricing page for more information.
Timeout is how long the function can go without finishing execution. If the Timeout is set at three seconds, and the function takes 4 seconds to execute, it will error out.
Now press "Next" and then "Create function"
Testing Your New Function
It usually takes under a minute for your function to be provisioned. When the next screen appears, press "Test". A modal should pop up. In the field where it says "key1": "value1" replace this with "key1": "My first lambda output!" Then scroll down and press "Save and test".
After it runs you should see the following in the bottom of the screen...
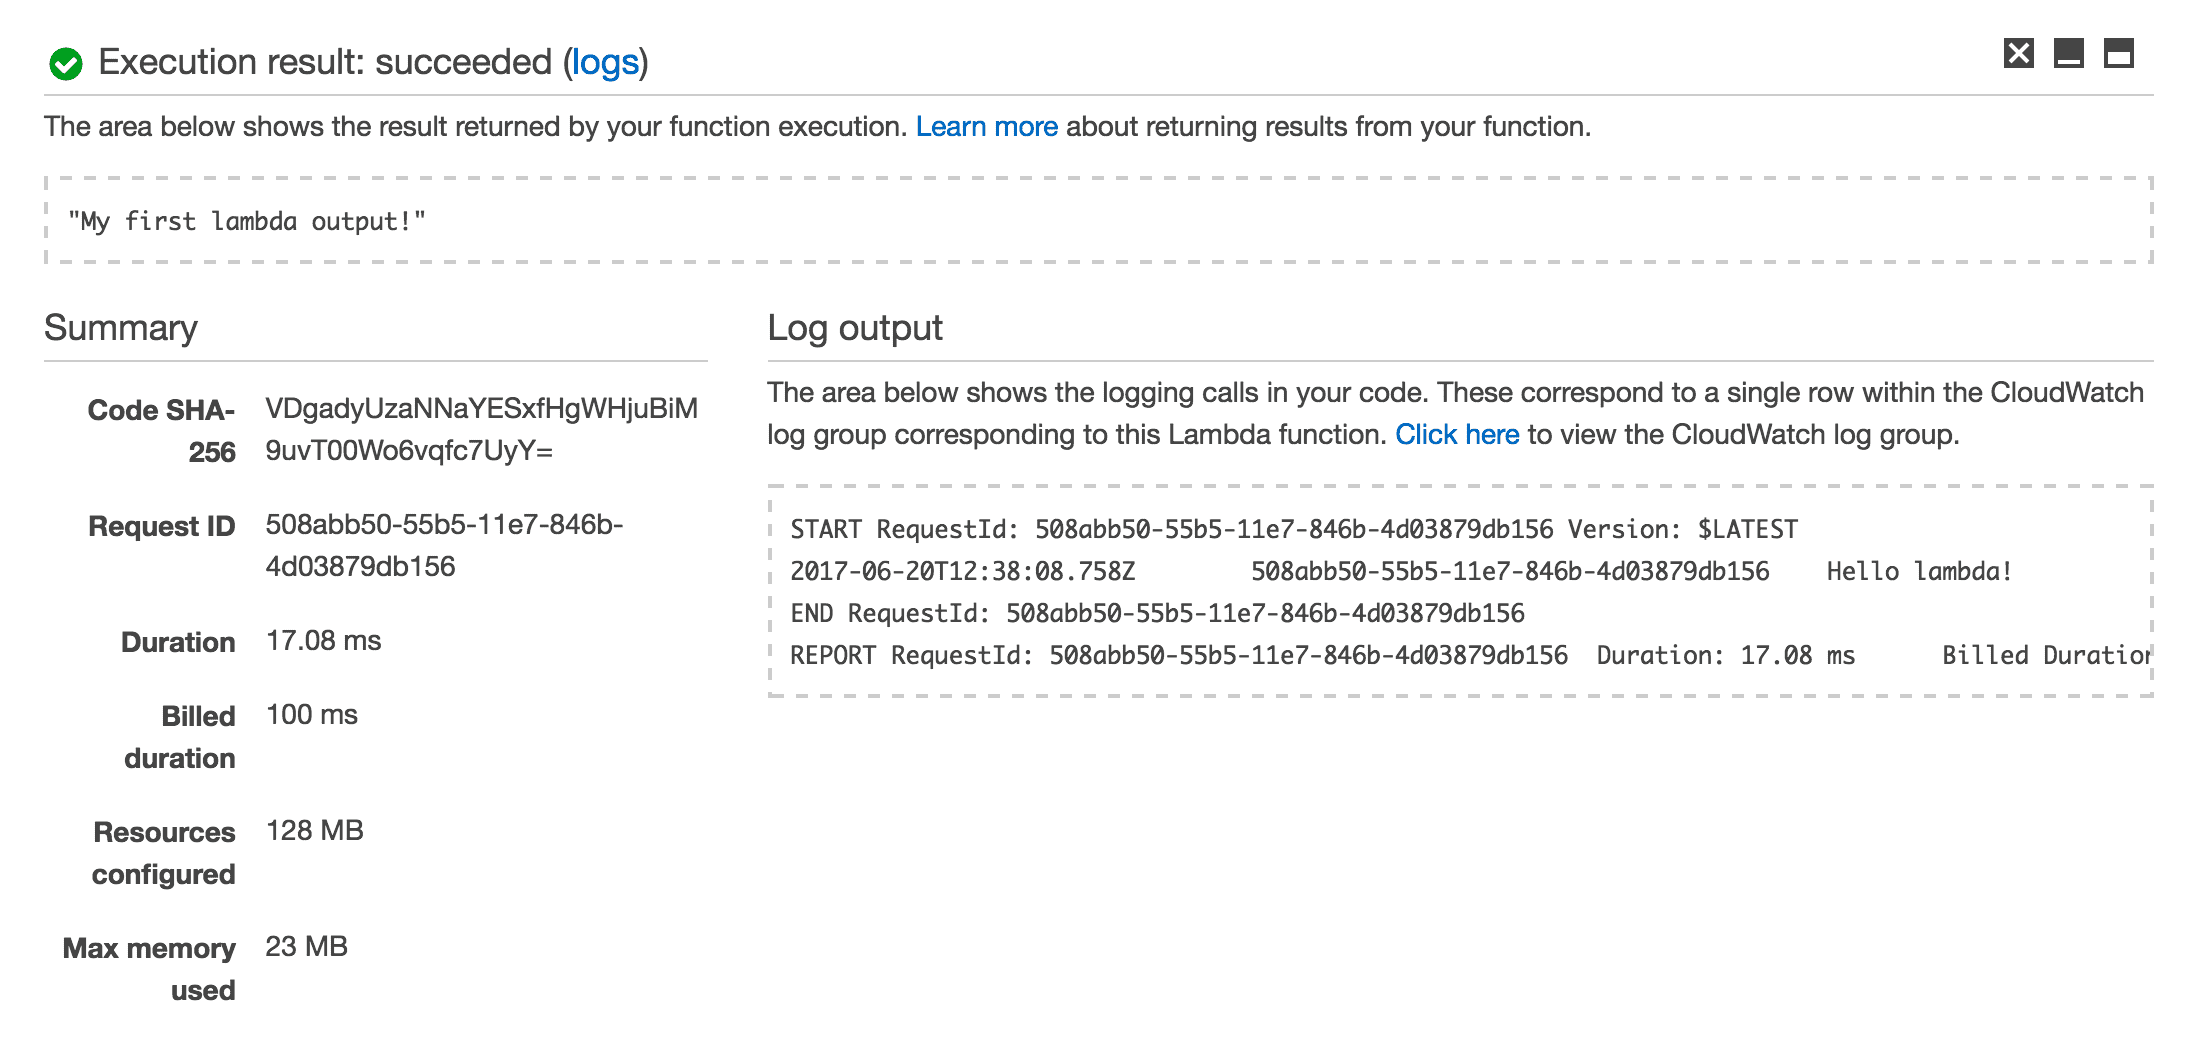
You should see that the output is "My first lambda output!". This displays in the top of the "Execution result: succeeded" screen.
Then under the "Log output" section of this screen you should see where it says "Hello lambda!".
This is the same log message that will display in Cloud Watch. Press where it says "logs" in parenthesis to see this logstream, and the ones before it.
If you have any more questions, feel free to contact me.